How To Grow Peppers In Pots On Patio
Learn how to grow peppers in pots on patio with this ultimate guide! Get expert tips on choosing containers, soil, watering, feeding, and avoiding common mistakes for a huge harvest.
How to Grow Peppers in Pots on Patio: The Ultimate Urban Gardener's Guide
Quick Summary: Growing vibrant, flavorful peppers right on your patio is incredibly rewarding and surprisingly simple. The key to success lies in choosing the right container size, providing plenty of sunlight, and maintaining consistent watering and feeding. Start with high-quality potting mix, select pepper varieties suited for containers, and don't be afraid to give them a little extra warmth. By following a few essential steps—from proper potting to pest management—you can enjoy a bountiful harvest of sweet and hot peppers all season long, transforming your patio into a productive urban farm.
The Joy of Growing Peppers on Your Patio
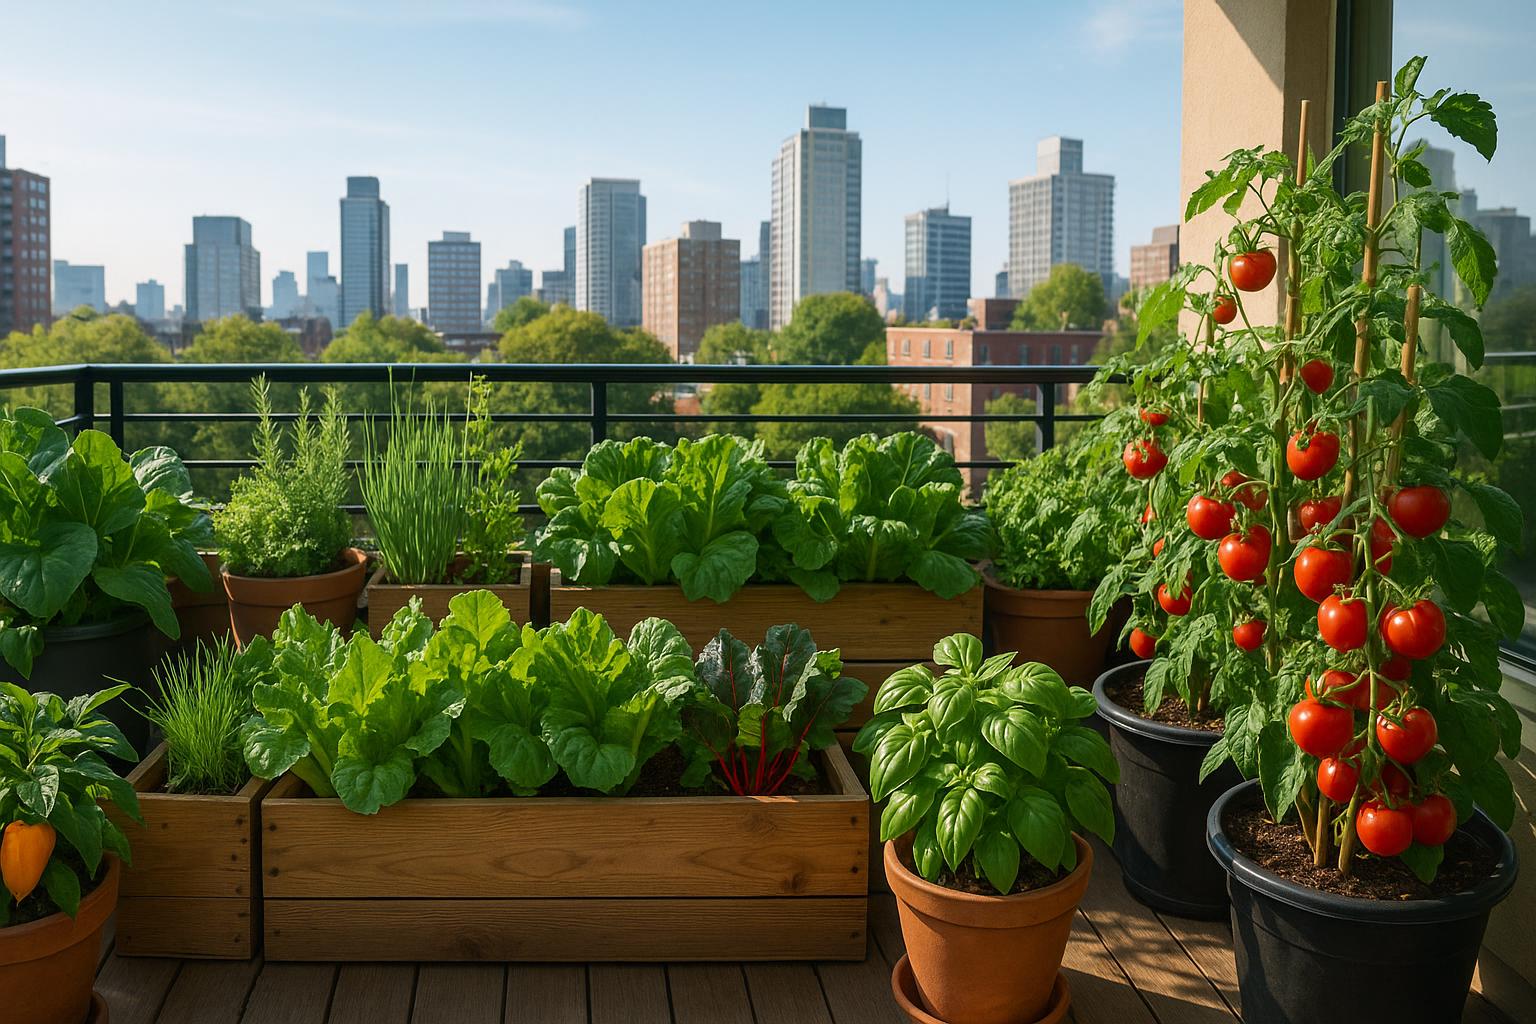
There is a unique satisfaction that comes from stepping onto your patio and plucking a perfectly ripe pepper for your dinner. For urban gardeners, container gardening is not just a hobby; it's a necessity, and peppers are one of the most ideal plants for this setting. They thrive in the warmth, their compact size is perfect for small spaces, and their colorful fruit adds a beautiful, edible decoration to any outdoor area. This comprehensive guide will walk you through everything you need to know about how to grow peppers in pots on patio, ensuring a successful and abundant harvest.
Peppers, whether sweet bell peppers or fiery jalapeños, are sun-loving plants that naturally lend themselves to the container life. They appreciate the focused attention that container gardening allows, and the mobility of pots means you can chase the sun or protect them from unexpected cold snaps. This method gives you complete control over the soil, nutrients, and environment, which is crucial for maximizing your yield.
H2: Essential Steps for Starting Your Pepper Garden
Success in growing peppers starts long before the first flower appears. It begins with careful planning and selecting the right materials. Getting these foundational steps correct will set your plants up for a season of healthy growth and heavy fruiting.
H3: Choosing the Right Pepper Varieties
Not all peppers are created equal when it comes to container gardening. While you can technically grow any pepper in a pot, some varieties are naturally more compact and better suited for the limited space. Look for varieties labeled as "dwarf," "compact," or "container-friendly."
For sweet peppers, consider varieties like 'Mini Bell' or 'Lunchbox' peppers, which produce small, prolific fruit on smaller plants. If you prefer hot peppers, 'Jalapeño M' or 'Habanero' plants often have a more manageable, bushy growth habit. The key is to match the plant's mature size to the container you plan to use.
H3: Selecting the Perfect Pot
The container size is perhaps the most critical factor when learning how to grow peppers in pots on patio. A pot that is too small will restrict root growth, leading to a stunted plant and a poor harvest. A good rule of thumb is to use a container that holds at least 3 to 5 gallons of soil per plant.
For a single pepper plant, a pot with a diameter of 10 to 12 inches is a minimum requirement. Larger pots, up to 7 gallons, are even better, as they provide more insulation against temperature fluctuations and require less frequent watering. Ensure your pot has excellent drainage holes; peppers hate "wet feet," and standing water will quickly lead to root rot. Materials like terracotta, plastic, or fabric grow bags all work well, but fabric bags offer superior aeration and drainage.
H3: The Importance of Quality Potting Mix
Do not use garden soil in your containers. Garden soil compacts easily, which suffocates the roots and prevents proper drainage. Instead, use a high-quality, sterile potting mix specifically formulated for containers.
A good potting mix should be light, airy, and well-draining, yet still capable of retaining some moisture and nutrients. You can enhance a standard mix by adding a handful of perlite or vermiculite to improve aeration. Before planting, mix in a slow-release granular fertilizer to provide a steady supply of nutrients as the plant grows.
H2: Planting and Initial Care for Patio Peppers
Once you have your pots and soil ready, it's time to introduce your pepper plants to their new home. Whether you are starting from seed or transplanting seedlings, the initial care is vital for establishing a strong root system.
H3: Transplanting Seedlings
If you purchased or grew seedlings, transplant them carefully to avoid shocking the roots. Dig a hole in the potting mix just large enough for the root ball. Place the seedling in the hole, ensuring the soil level is the same as it was in the original container. Gently firm the soil around the base of the plant.
Water the newly transplanted pepper thoroughly until water runs out of the drainage holes. This helps settle the soil and eliminates any air pockets around the roots. For the first week, keep the plant in a slightly shaded area to help it acclimate before moving it to its final, sunny location.
H3: Sunlight and Temperature Requirements
Peppers are tropical plants and demand as much sun as you can give them. For the best results, your patio should receive at least six to eight hours of direct sunlight per day. A south-facing or west-facing patio is usually ideal.
Temperature is equally important. Peppers will not thrive in cool weather. The ideal temperature range for growth is between 70°F and 85°F (21°C and 29°C). Do not move your pepper plants outside permanently until all danger of frost has passed and nighttime temperatures consistently stay above 55°F (13°C). The ability to move your pots indoors or against a warm wall is a major advantage of learning how to grow peppers in pots on patio.
H2: Watering, Feeding, and Maintenance
The daily care of your pepper plants will determine the quality and quantity of your harvest. Container plants dry out much faster than in-ground plants, so a consistent routine is essential.
H3: Consistent Watering is Key
The biggest mistake container gardeners make is inconsistent watering. Peppers prefer consistently moist, but not soggy, soil. Allow the top inch of soil to dry out slightly between waterings, but never let the entire pot dry out completely.
During the peak of summer, especially if you are growing peppers in pots on a hot patio, you may need to water once or even twice a day. To check if your plant needs water, simply stick your finger an inch or two into the soil. If it feels dry, it's time to water. Water deeply until you see water draining from the bottom of the pot, which ensures the entire root ball is saturated.
H3: The Right Nutrition for Fruiting
Peppers are heavy feeders, especially when they are producing fruit. Since container soil has a limited nutrient supply, you must supplement with fertilizer throughout the growing season.
Start with a balanced, all-purpose fertilizer (like a 10-10-10) when the plant is young to encourage leafy growth. Once the plant begins to flower and set fruit, switch to a fertilizer that is lower in nitrogen and higher in phosphorus and potassium (like a 5-10-10 or a "tomato and vegetable" formula). Apply a liquid fertilizer every two to three weeks, following the instructions on the product label. Calcium and magnesium are also vital for preventing blossom end rot, a common pepper problem, so consider a supplement if you notice this issue.
H3: Pruning and Support
As your pepper plants grow, they may benefit from some light pruning and support. Pruning, especially "topping" the plant when it is young, can encourage a bushier, sturdier plant with more branching, which ultimately leads to more fruit. Simply pinch off the main growing tip when the plant is about 6 to 8 inches tall.
Once the plant is loaded with fruit, the branches can become heavy and snap. Provide support by inserting a simple bamboo stake or a small tomato cage into the pot. This is particularly important for larger pepper varieties.
H2: Common Mistakes to Avoid for Patio Peppers
Even experienced gardeners can run into issues. Being aware of common pitfalls will help you quickly diagnose and fix problems, keeping your pepper plants healthy and productive.
H3: Overwatering and Underwatering
As mentioned, this is the number one issue. Overwatering leads to root rot, which manifests as yellowing leaves and wilting, ironically mimicking the look of an underwatered plant. Underwatering causes the plant to drop its flowers and fruit in a desperate attempt to conserve energy. Use the finger test and ensure your pots drain freely to maintain the perfect moisture balance.
H3: Ignoring Pests and Diseases
Container plants are not immune to pests. Common pepper pests include aphids, whiteflies, and spider mites. Inspect the undersides of the leaves regularly. If you spot a problem, treat it immediately with an organic insecticidal soap or a strong jet of water to knock the pests off.
The most common disease is blossom end rot, which causes the bottom of the fruit to turn black and mushy. This is not a disease but a calcium deficiency, often caused by inconsistent watering that prevents the plant from absorbing the calcium in the soil. Consistent watering is the best cure.
H3: Planting Too Early or Too Late
Peppers are extremely sensitive to cold. Planting them outside too early, even if there is no frost, can stunt their growth for weeks. Wait until the soil and air are consistently warm. Conversely, planting too late in the season may mean the plant doesn't have enough time to mature and produce a full harvest before the first fall chill arrives. Timing is everything when you are learning how to grow peppers in pots on patio.
H2: Harvesting Your Patio Bounty
The final, and most exciting, step is the harvest. Knowing when and how to pick your peppers is crucial for both flavor and encouraging the plant to produce even more.
H3: When to Pick
The time to harvest depends entirely on the variety and your preference. Sweet peppers, like bell peppers, are often picked when they are green, but they will develop a sweeter flavor and change color (red, yellow, or orange) if left on the vine longer. Hot peppers are generally hotter the longer they stay on the plant, but they also change color when fully ripe, which is often when their flavor is at its peak.
Check your seed packet or plant tag for the typical days to maturity. When the pepper is firm and has reached the desired size and color, it is ready.
H3: The Right Way to Harvest
Never pull the peppers off the plant, as this can damage the branches. Instead, use a clean pair of gardening shears or a sharp knife to cut the stem about an inch above the pepper. Harvesting regularly encourages the plant to produce more flowers and, consequently, more fruit, extending your season.
Conclusion: Your Patio is Ready for a Pepper Revolution
Growing peppers in pots on your patio is a fantastic way to bring the garden right to your doorstep. It’s a manageable, rewarding project that yields delicious results. By focusing on the right pot size, providing ample sun, and maintaining a consistent watering and feeding schedule, you will be well on your way to a spectacular pepper harvest. The convenience of having fresh, homegrown peppers just steps away is a game-changer for any home cook. Now that you know how to grow peppers in pots on patio, it's time to put this knowledge into action.
Ready to plan your perfect urban garden layout and track your pepper progress?
Take the next step: Use the Urban Grow Planner tool to map out your patio space, track your planting dates, and set reminders for watering and feeding. Happy gardening!
Related Articles
How To Start Urban Farming For Beginners
Ready to grow your own food? Learn how to start urban farming for beginners with this comprehensive guide on planning, small-space techniques, essential equipment, and common mistakes to avoid.
Balcony Garden Ideas For Beginners
Discover the ultimate balcony garden ideas for beginners! Learn how to maximize small spaces with vertical gardening, choose the best easy-to-grow plants, and avoid common mistakes. Start your urban oasis today!
Container Gardening For Beginners Step By Step
Start your urban garden with this step-by-step guide to container gardening for beginners. Learn about choosing pots, soil, plants, watering, and avoiding common mistakes.
How To Grow Vegetables On Apartment Balcony
Learn how to grow vegetables on apartment balcony with this ultimate guide. Get tips on sun, containers, soil, and the best compact crops for a successful urban garden.