Windowsill Herb Garden For Beginners
Start your own windowsill herb garden today! This beginner's guide covers the best herbs, light requirements, watering tips, and common mistakes to ensure a thriving, year-round indoor harvest.
Grow Your Own Fresh Flavors: The Ultimate Guide to a Windowsill Herb Garden for Beginners
Quick Summary: Starting a windowsill herb garden for beginners is a simple, rewarding way to bring fresh flavors and a touch of green into your home, no matter how small your space. The key to success lies in choosing the right herbs, providing adequate light (ideally 5-6 hours of direct sun), using well-draining soil, and mastering a consistent watering routine. This comprehensive guide will walk you through every step, from selecting your first plants to harvesting your bounty, ensuring you avoid common pitfalls and enjoy a thriving, year-round indoor garden.
Why Start a Windowsill Herb Garden for Beginners?
The appeal of a windowsill herb garden for beginners is undeniable. It’s the perfect entry point into gardening, requiring minimal space, time, and investment. Imagine the convenience of snipping fresh basil for your pasta sauce or mint for your tea, all without leaving your kitchen. This simple act transforms your cooking, reduces food waste, and adds a vibrant, natural element to your living space.
The Benefits of Indoor Herb Gardening
- Year-Round Freshness: Unlike outdoor gardens, your windowsill setup is protected from the elements, allowing you to harvest fresh herbs even in the dead of winter.
- Space Efficiency: A windowsill is all you need. This makes it ideal for apartment dwellers, urban gardeners, or anyone with limited outdoor space.
- Cost Savings: While the initial setup is small, the long-term savings on store-bought herbs, which often wilt quickly, can add up.
- Therapeutic Hobby: Gardening is a proven stress reliever. Tending to your herbs provides a calming, hands-on activity that connects you with nature.
Phase 1: Setting Up Your Windowsill Herb Garden
A successful indoor herb garden starts with careful planning and the right materials. Don't rush this step; the foundation you lay now will determine your long-term success.
H2: Choosing the Perfect Location and Light
Light is the single most important factor for a thriving herb garden. Herbs are sun-loving plants, and your windowsill must provide enough light to sustain them.
H3: Understanding Your Window's Exposure
- South-Facing Window: This is the gold standard. A south-facing window receives the most intense, direct sunlight throughout the day, often providing the necessary 5 to 6 hours of direct sun that most herbs crave [1].
- Southwest-Facing Window: A close second, offering strong afternoon light. This is an excellent spot for many herbs.
- East-Facing Window: Provides gentle morning light. This is suitable for herbs that tolerate slightly less sun, like mint or parsley.
- North-Facing Window: This is the most challenging location, offering very little direct light. If this is your only option, you will almost certainly need to supplement with a grow light.
Tip: If your window doesn't provide enough natural light, consider a simple LED grow light. A full-spectrum light placed a few inches above your plants can make all the difference, especially during shorter winter days.
H2: Selecting Your Containers and Soil
The right pot and potting mix are crucial for healthy root development and proper drainage.
H3: The Best Containers for Herbs
- Material: Terracotta (clay) pots are excellent because they are porous and allow excess moisture to evaporate, which helps prevent root rot. However, they also dry out faster, so you'll need to water more frequently. Plastic or glazed ceramic pots retain moisture longer.
- Size: Start with pots that are at least 6 to 8 inches in diameter. While you can start seeds in smaller containers, mature herbs need room for their roots to grow.
- Drainage: Every single pot must have a drainage hole. This is non-negotiable. If water can't escape, the roots will sit in soggy soil and quickly rot. Use a saucer or tray underneath to catch the runoff.
H3: Choosing the Right Potting Mix
Do not use garden soil from outside; it is too dense and may contain pests or diseases.
- Use a high-quality, sterile potting mix designed for containers. Look for mixes that are light and airy, often containing perlite or vermiculite to improve drainage and aeration.
- Consider a specialized herb or vegetable mix for the best results.
- Optional: Mix in a handful of compost to provide a slow-release source of nutrients.
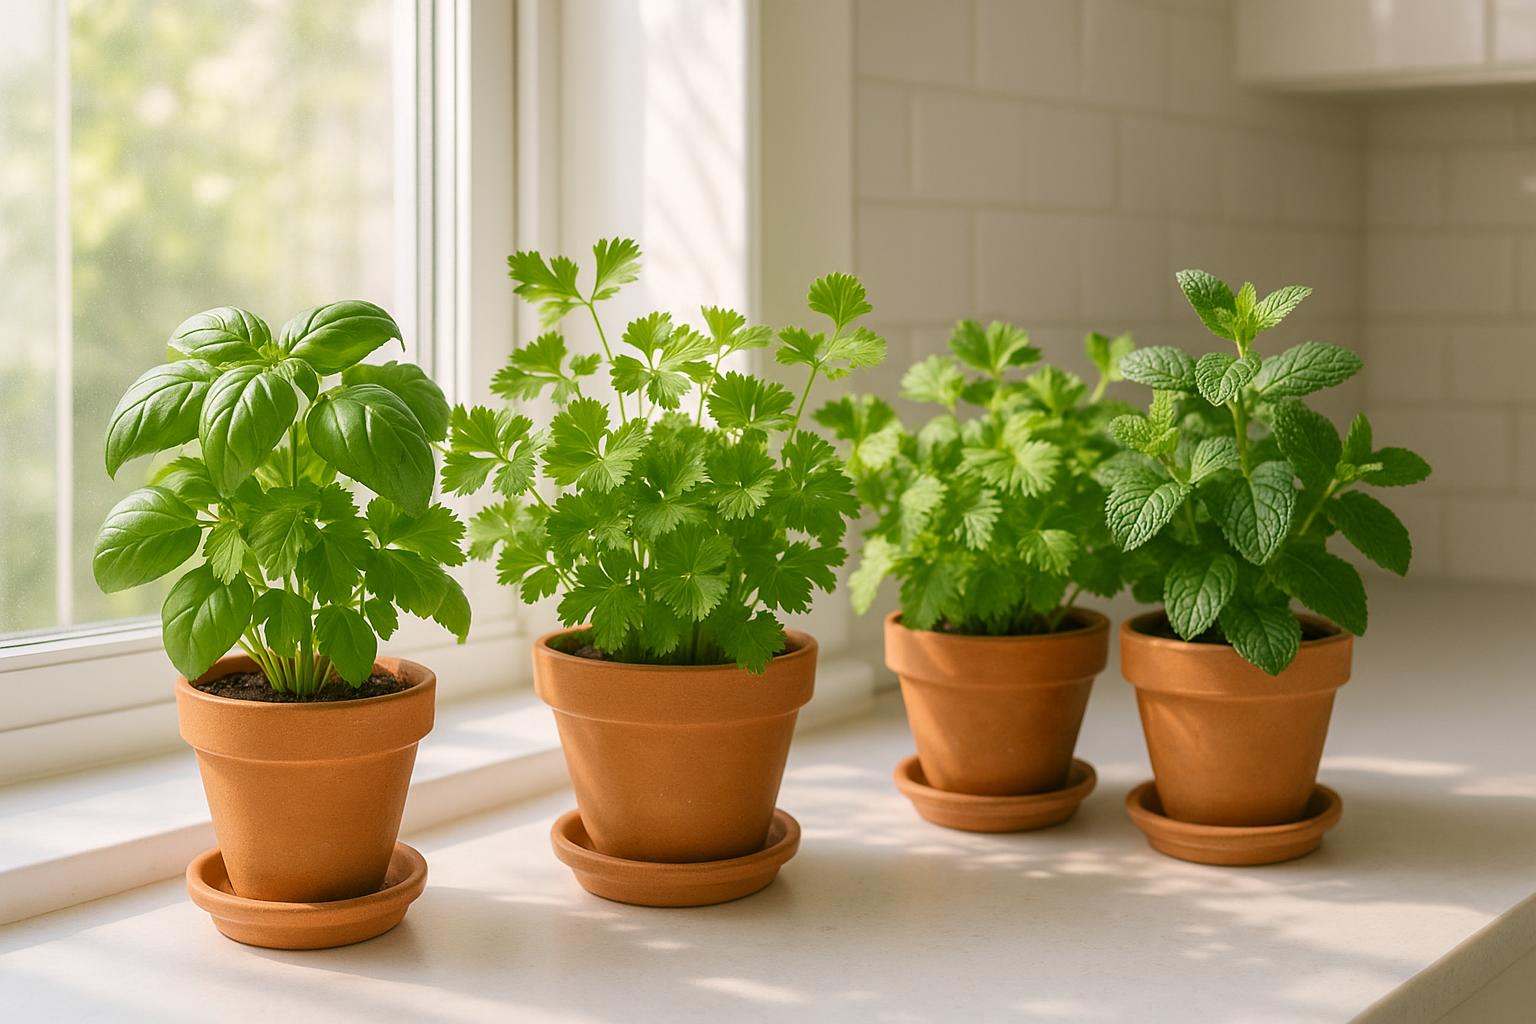
H2: Choosing the Best Herbs for Your Windowsill
When starting a windowsill herb garden for beginners, it's best to select herbs that are known to tolerate indoor conditions and are easy to grow.
| Herb | Light Preference | Watering Needs | Beginner Tip |
|---|---|---|---|
| Basil | High (6+ hours) | Keep soil consistently moist | Prune often to encourage bushier growth. Avoid cold drafts. |
| Chives | Medium to High | Keep soil consistently moist | Very hardy and regrows quickly. Snip from the outside. |
| Mint | Medium (Tolerates less light) | Keep soil consistently moist | Must be planted in its own pot as it spreads aggressively. |
| Thyme | High (Drought tolerant) | Allow soil to dry out between waterings | Prefers slightly sandy, well-draining soil. |
| Oregano | High (Drought tolerant) | Allow soil to dry out between waterings | Similar to thyme, it thrives on neglect and good sun. |
| Parsley | Medium (Tolerates morning sun) | Keep soil consistently moist | Can be slow to germinate from seed; buy a small plant for faster results. |
| Rosemary | High (Loves heat and sun) | Allow soil to dry out completely | Prone to powdery mildew if air circulation is poor. |
Tip: Start with small plants (starts) from a nursery rather than seeds. This provides instant gratification and a higher chance of success for a beginner. If you do use seeds, be patient, as some herbs like parsley and rosemary can take weeks to sprout.
Phase 2: Mastering the Care and Maintenance
Once your herbs are set up, the next step is to establish a consistent care routine. This is where many beginners stumble, but with a few simple rules, you can keep your herbs happy and productive.
H2: The Art of Watering Your Herbs
Overwatering is the number one killer of indoor plants. It suffocates the roots and leads to root rot.
H3: How to Water Correctly
- The Finger Test: Stick your index finger about an inch or two into the soil. If the soil feels dry, it's time to water. If it feels moist, wait another day or two.
- Water Thoroughly: When you do water, water deeply until you see water running out of the drainage holes into the saucer. This ensures the entire root ball is saturated.
- Empty the Saucer: Crucially, empty the saucer 15-20 minutes after watering. Allowing the pot to sit in standing water will lead to root rot.
- Watering Frequency: This will vary based on the herb, the pot material, and the season. Terracotta pots in a sunny window may need water every 2-3 days, while plastic pots in a cooler spot might only need it once a week.
H2: Feeding and Pruning for Maximum Yield
Herbs grown in containers will eventually deplete the nutrients in their potting mix. They also need regular pruning to stay bushy and productive.
H3: When and How to Fertilize
- Start Slow: For the first few months, your herbs will get enough nutrients from the fresh potting mix.
- Use a Balanced Liquid Fertilizer: After about 3-4 months, begin feeding with a diluted, balanced liquid fertilizer (e.g., 10-10-10) at half the recommended strength.
- Frequency: Fertilize once a month during the spring and summer growing seasons. Reduce or stop feeding entirely in the fall and winter when growth naturally slows down.
H3: Pruning for Bushy Growth
- Harvesting is Pruning: The best way to prune your herbs is to use them! Regular harvesting encourages the plant to branch out and produce more leaves, leading to a bushier, healthier plant.
- The 1/3 Rule: Never remove more than one-third of the plant's foliage at any one time.
- Prune Above a Node: When harvesting, snip the stem just above a leaf set (a node). This is where the plant will sprout two new stems, doubling your future harvest.
- Pinching Basil: For basil, always pinch off the central growing tip once the plant has a few sets of true leaves. This prevents it from growing tall and spindly and encourages that desirable bushy shape.
Phase 3: Troubleshooting and Common Mistakes
Even the most careful gardener will encounter a few issues. Knowing how to spot and fix problems is part of the fun of a windowsill herb garden for beginners.
H2: Common Mistakes to Avoid
Avoiding these pitfalls will dramatically increase your success rate:
- Lack of Light: The most common mistake. If your herbs are stretching, pale, or have sparse leaves, they need more light. Move them to a sunnier spot or invest in a grow light.
- Overwatering: As mentioned, this is the second biggest killer. Always check the soil moisture before watering, and ensure excellent drainage.
- Planting Herbs Together: While it's tempting to create a beautiful mixed pot, different herbs have different needs. For example, Rosemary (drought-tolerant) and Basil (moisture-loving) should never be planted in the same container. Keep them separate to control their individual environments [2].
- Ignoring Pests: Indoor plants can still get pests. Keep an eye out for tiny white flies (whiteflies), sticky residue (aphids), or fine webbing (spider mites).
H2: Dealing with Pests and Diseases
If you spot a pest, act quickly to prevent it from spreading to your other plants.
- Isolation: Immediately move the affected plant away from your other herbs.
- Wipe Down: For small infestations, simply wipe the leaves with a damp cloth or cotton swab dipped in rubbing alcohol.
- Natural Spray: Use an insecticidal soap or a homemade solution of water, a few drops of dish soap, and a teaspoon of neem oil. Spray the entire plant, especially the undersides of the leaves, every 5-7 days until the pests are gone.
H2: Specific Tips for Tricky Herbs
Some herbs require a little extra attention:
- Cilantro and Parsley: These herbs prefer cooler temperatures and can "bolt" (go to seed) quickly in hot, direct sun. Place them in an east-facing window or a slightly cooler spot.
- Rosemary: This woody herb needs excellent air circulation and hates being waterlogged. If the leaves start to turn brown, it's usually a sign of too much water or poor air flow.
- Basil: Basil is a tropical plant and is extremely sensitive to cold. Keep it away from cold windowpanes and drafts, especially at night.
Phase 4: Harvesting and Enjoying Your Bounty
The best part of your windowsill herb garden for beginners is the harvest! Knowing how to properly pick your herbs will ensure the best flavor and keep your plants producing.
H2: Best Practices for Harvesting
- Harvest in the Morning: The flavor and essential oil content of most herbs are highest in the morning after the dew has dried but before the heat of the day.
- Use Sharp Tools: Always use clean, sharp scissors or pruners to make a clean cut. Tearing or crushing the stems can damage the plant.
- Harvest Just Before Use: For the best flavor, harvest your herbs right before you plan to use them in a recipe.
- Don't Over-Harvest: Remember the 1/3 rule. Leave enough foliage for the plant to continue photosynthesizing and growing.
H2: Storing Your Fresh Herbs
If you have a large harvest, you can store your herbs to enjoy later:
- Short-Term Storage (Refrigerator): Treat them like a bouquet of flowers. Place the stems in a glass of water, cover the leaves loosely with a plastic bag, and store them in the refrigerator. They will stay fresh for up to a week.
- Long-Term Storage (Freezing): Chop the herbs finely and mix them with a little olive oil or water. Spoon the mixture into ice cube trays and freeze. Once frozen, transfer the cubes to a freezer bag. This is perfect for adding to soups and stews.
- Drying: Tie small bundles of herbs (like thyme, rosemary, or oregano) and hang them upside down in a warm, dry, and dark place until they are brittle. Store the dried leaves in an airtight container.
Conclusion: Your Green Journey Starts Now
You now have all the knowledge you need to successfully grow a thriving windowsill herb garden for beginners. From selecting the perfect sunny spot to mastering the delicate balance of watering and pruning, you are ready to embark on this rewarding journey. The joy of adding a pinch of your own homegrown basil or a sprig of fresh mint to your meals is unparalleled.
Don't let the thought of a "green thumb" intimidate you. Gardening is a process of learning and observation. Every plant you grow, every challenge you overcome, makes you a better gardener.
Ready to take your urban gardening to the next level?
Plan your next planting, track your watering schedule, and monitor your light conditions with the Urban Grow Planner tool. It's the perfect companion to help you manage your new windowsill herb garden and ensure a continuous, fresh harvest. Happy growing!
Related Articles
How To Start Urban Farming For Beginners
Ready to grow your own food? Learn how to start urban farming for beginners with this comprehensive guide on planning, small-space techniques, essential equipment, and common mistakes to avoid.
Balcony Garden Ideas For Beginners
Discover the ultimate balcony garden ideas for beginners! Learn how to maximize small spaces with vertical gardening, choose the best easy-to-grow plants, and avoid common mistakes. Start your urban oasis today!
Container Gardening For Beginners Step By Step
Start your urban garden with this step-by-step guide to container gardening for beginners. Learn about choosing pots, soil, plants, watering, and avoiding common mistakes.
How To Grow Vegetables On Apartment Balcony
Learn how to grow vegetables on apartment balcony with this ultimate guide. Get tips on sun, containers, soil, and the best compact crops for a successful urban garden.